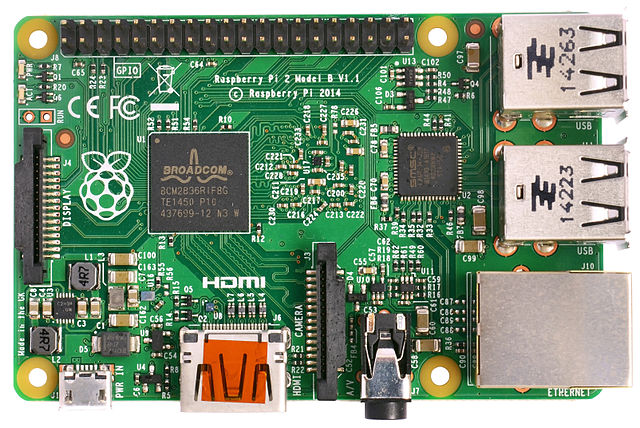
The Raspberry Pi

A Raspberry Pi is a small computer that is capable of performing a vast amount of tasks and is used by reserachers, students, and hobbiest to accomplish different tasks.
Things Needed Before You Begin
| Raspberry Pi (model B, B+, or 2) | |
| SD card that is at least 4GB, 8GB is recommended (to hold OS) | |
| Micro USB cable and power adapter (for power) | |
| Network cable (Internet access is preferred, but not required) | |
| Keyboard | |
| Mouse (preferred, but not required) | |
| Monitor |
Setup a Rasperry Pi:
Step 1 of 5: Download a copy of Raspbian: Download a copy of Raspbian from the raspbian.org. If you have already setup the Raspberry Pi, please jump to Configure my Pi
Step 2 of 5: Copy the OS image to the SD card: After downloading the OS, copy the image to an SD card that is larger that 4 GB. This can be done using many different methods and the instructions can be found on the official Raspberry Pi Website. The following links will take you to the appropriate page based on your OS:
Step 3 of 5: Install the SD card: Insert the SD card into the SD card slot on the bottom of the Raspberry Pi.
Step 4 of 5: Connect the Keyboard, Mouse, Display, and Network cables: The keyboard and mouse can be plugged into the USB connections, the display an be plugged into the HDMI port, and the network cable can be plugged into the Ethernet port.
Step 5 of 5: Power on the Device : After all cables and desired peripherals are plugged in, plug in the power to get started.
Configure Rasperry Pi For Use:
Step 1 of 4: Expand Filesystem: Scroll to "expand_rootfs" and then "Select".This expands the filesystem on the SD so that it can use the entire disk space
Step 2 of 4: Enable SSH: Scroll to "ssh" and then "Select". This enables SSH for remote management of system.
Step 3 of 4: Save settings and reboot: Scroll to "Save and Reboot"
Step 4 of 4: Login to device: Once the operating system finishes rebooting, you will need to log in. The default username is "pi", and the default password is "raspberry".
